
Hello Friends,
In the last post we have looked into main files and folders which we get when we create new React application with TypeScript. You can go with that post here.
Understanding main Files and folders in create React Application
In this post we will look into how we can create new React component and Render it on browser. We will also look into the the JSX which is used by React.
so, first thing first, The React library uses component based structure for building a UI application. The component can be nested and follow the hierarchy structure as per your application. for example, The entire application can be main component, the header, main content area, footer can be separate component, the main content area can have sidebar and the content area. All, these can be arranged in tree structure to render your application UI.
but, lets understand what is React component first. The React component is combination of CSS, JavaScript/TypeScript and JSX.
JavaScript/TypeScript + JSX + CSS(optional)= React Component.
The React component can be of two types, the first one is the function component and it is most popular one, the another is class based component which is more liked by the developers who are very used on classes and objects and liked to see everything around that.
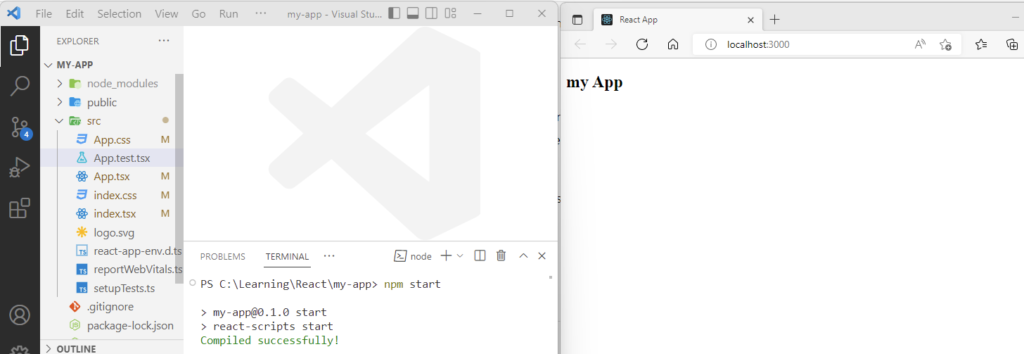
With this small introduction about React component, lets open the last created application in vscode and create a new react function component. here is the running application with output before starting.
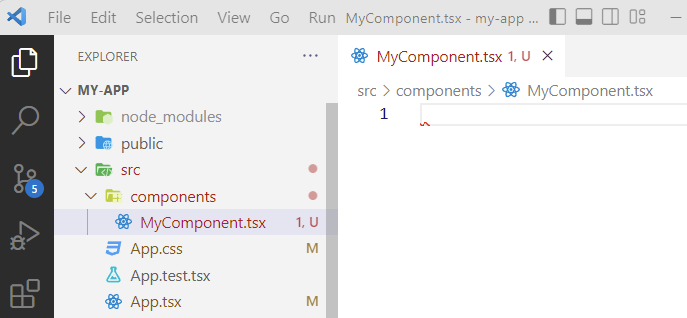
We can create the component in src folder but to better arrange lets create a new folder named ‘components’ in src folder and then create new typescript file in that named ‘MyComponent’ in ‘components’ folder. You might have similar output as below.
The React function components are simple functions which returns special syntax JSX, this is understood by React and then transformed to JavaScript and HTML which understood by browsers.
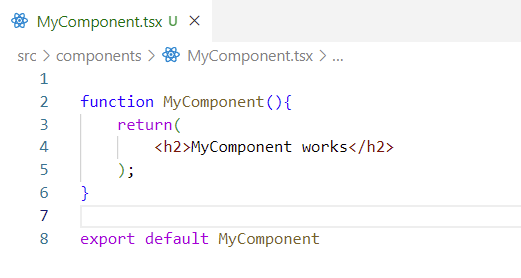
The above is very simple code which will output ‘MyComponent works’. As you see the about code is a function which is returning the h2 with some text, this special code inside the return statement is JSX. The last line of code is statement which enable the current component to be used by other components. you might be thinking that h2 is the html tag but this is a JSX tag.
There are very simple rule to return a JSX tag. There should be only one tag which can be returned , that one tag can have many children tags and this not matter. you can use any tag which have closing tags like div, span or <> </> as a parent tag but mostly div is used. The another point is, you can return a dynamic content which curly brackets { } in the JSX tags.
Lets update the above code to understand the above theory better.

Let see how to see the output on browser. Here, we need to inform the main component about this new component, Lets update the App.tsx file for this as below.
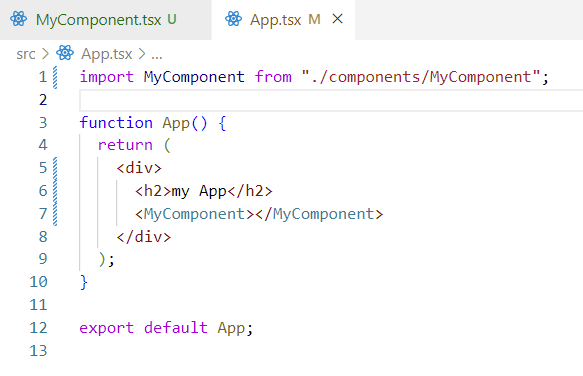
In the above code we are importing the newly created component in App component and then rendering that inside the return statement using <MyComponent></MyComponent> tag. This tag looks very similar to html tags but this is custom tag for your component.
If you app is running(if not run that using npm start in terminal) your output may be very similar to below.
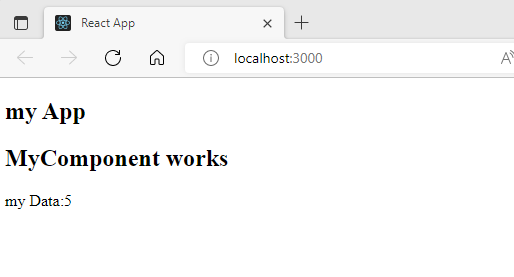
Congrats, you just created new React Component, used some JSX and returned dynamic data and then rendered that component on browser.
Thanks and Happy Learning :). Please give your valuable feedback and share this post.
2 thoughts on “Create your first React Component and understanding JSX”