
Inside this article:
- What and why about lifting state up
- Building example code
- Adding Input elements with useState and event handler
- Rendering input elements on UI using App component
- Lifting State up | Pass data and event to child component.
- Lifting State up | executing parent component event in child component
- Using Array.map function to render dynamic list
what and why about lifting state up
While developing a React application you may encounter a situation that you have some data or state data in one component(lets name it as A) and you want the same data to be available to another component(Lets name is as B). also, the difficulty is, the component A and B are not directly related. i.e, both component are not come in one parent child tree or we can say that they are not siblings.
Lets take an example, you have an application and you have two component NewUser component and UsersList component. The NewUser component takes new users information like first name, last name and email as input and the UsersList component display the all the users who registered with application. The App component is rendering both component on screen. Here is the diagram for understand the senario better.
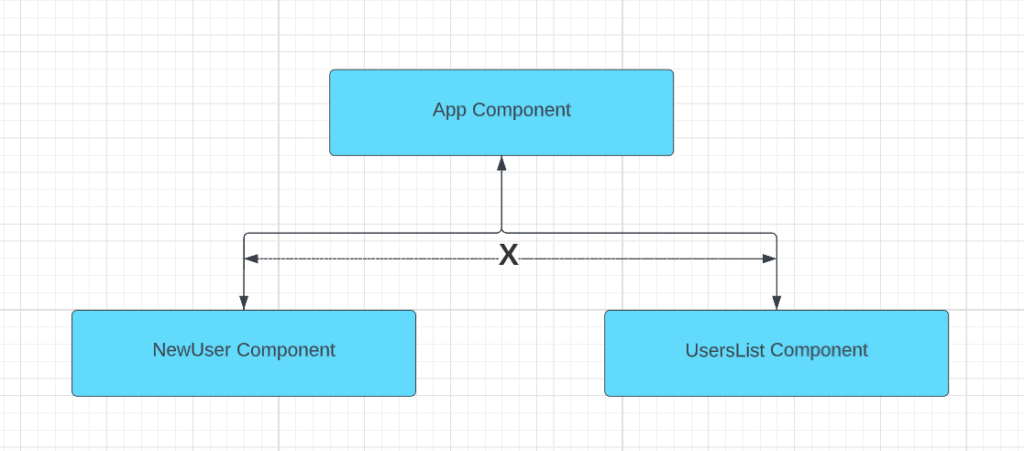
In above diagram I tried to show how we can communicate the data from one component to another. We can send the data to parent component from child component or to child component from parent component on same component tree without skipping the component hierarchy but you can not transfer data directly if the component are not on same tree hierarchy which means, you can transfer data from NewUser component to the App component , UserList component to App component or vice versa but you can not transfer data from NewUser component to UsersList or UsersList component to NewUser component directly.
So, to solve the senario in example, we can transfer data/state from NewUser to App component and from App component to UsersList component. This is exactly “Lifting State Up” and it means lift the state up till that component where we can send the state down to another component tree.
Building example code
Lets understand this with code example. We are going to add the NewUser and UsersList component in the same app which we have used in previous examples too. If you missed to read that Here is the link of same
Pass data from child component to its parent in ReactJS- Using “useEffect” and “props” – CodeLila

I have added the NewUserComponent.tsx and UsersListComponent.tsx in components folder. I also cleared up old component for simplify the example here.
Adding Input elements with useState and event handler
Lets update the NewUser component first to take first name , last name and email from user and store it on state.
Here is the updated NewUserComponent.tsx
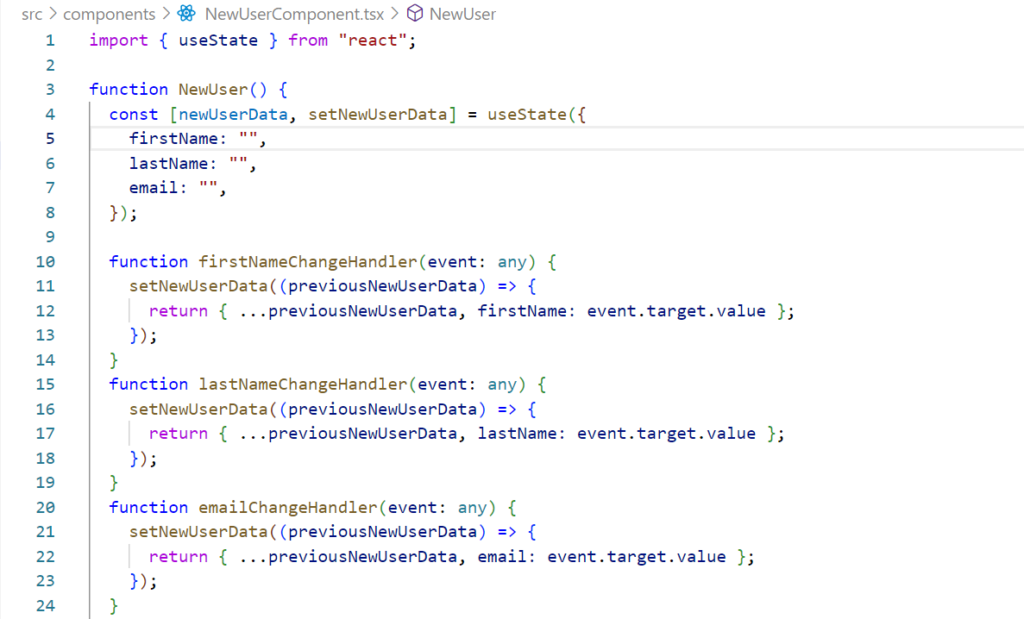
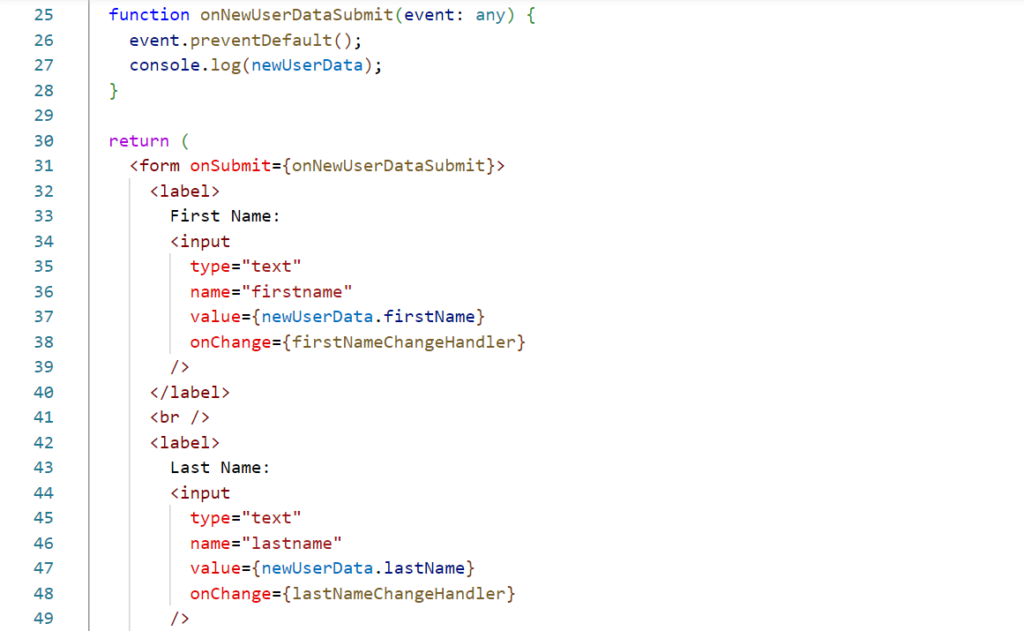

The above code is very simple we have added three input for firstname, last name and email and then corresponding event handler, and then using state to manage the user input too. If you are facing difficlity understanding the above code, then you can go with below post which can help you understand the concepts used above in great details. Here is the link of same.
Rendering input elements on UI using App component
Now, I have updated the App component to see if the component is working or not as below.
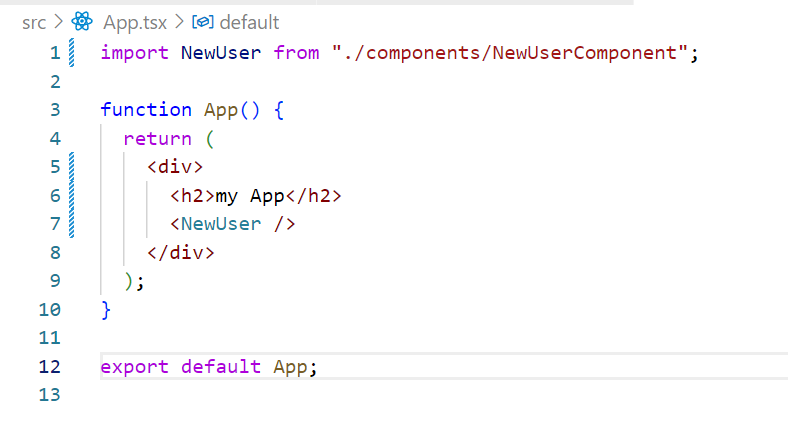
Here is the output on browser.
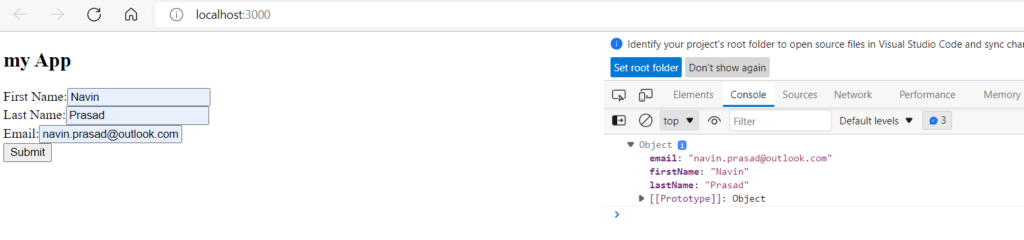
so, the NewUser component is able to collect the user information.
Lifting State up | Pass data and event to child component.
Lets update the App component first, so that it can have a dummy user list (for demo) and we can add new user information to that user list.
import { useState } from "react";
import NewUser from "./components/NewUserComponent";
import UsersList from "./components/UsersListComponent";

function App() {
  const [users, setUsers] = useState([
    {
      firstName: "Ram",
      lastName: "kumar",
      email: "ram@ram.com",
    },
    {
      firstName: "Manish",
      lastName: "kumar",
      email: "manish@manish.com",
    },
  ]);

  function onNewUserAdded(newUserData: any) {
    setUsers((prevUsers) => {
      return [newUserData, ...prevUsers];
    });
  }

  return (
    <div>
      <h2>my App</h2>
      <NewUser onNewUserAdded={onNewUserAdded} />
      <UsersList users={users} />
    </div>
  );
}

export default App;
In the above code we are using state to manage the users , we also passing the ” onNewUserAdded” method to NewUser component to get the newly added user back and once we have that new user information we are adding that to users list in App component using setUsers function.
Lifting State up | executing parent component event in child component
Here is the updated code for “NewUserComponent.tsx” file.
import { useState } from "react";

function NewUser(props: any) {
  const [newUserData, setNewUserData] = useState({
    firstName: "",
    lastName: "",
    email: "",
  });

  function firstNameChangeHandler(event: any) {
    setNewUserData((previousNewUserData) => {
      return { ...previousNewUserData, firstName: event.target.value };
    });
  }
  function lastNameChangeHandler(event: any) {
    setNewUserData((previousNewUserData) => {
      return { ...previousNewUserData, lastName: event.target.value };
    });
  }
  function emailChangeHandler(event: any) {
    setNewUserData((previousNewUserData) => {
      return { ...previousNewUserData, email: event.target.value };
    });
  }
  function onNewUserDataSubmit(event: any) {
    event.preventDefault();
    props.onNewUserAdded(newUserData);
  }

  return (
    <form onSubmit={onNewUserDataSubmit}>
      <label>
        First Name:
        <input
          type="text"
          name="firstname"
          value={newUserData.firstName}
          onChange={firstNameChangeHandler}
        />
      </label>
      <br />
      <label>
        Last Name:
        <input
          type="text"
          name="lastname"
          value={newUserData.lastName}
          onChange={lastNameChangeHandler}
        />
      </label>
      <br />
      <label>
        Email:
        <input
          type="text"
          name="email"
          value={newUserData.email}
          onChange={emailChangeHandler}
        />
      </label>
      <br />
      <input type="submit" value="Submit" />
    </form>
  );
}

export default NewUser;
Using Array.map function to render dynamic list
We also passing the same “users” list to the UsersListComponent. Here is the updated code for same.
function UsersList(props: any) {
  return <div>{props.users.map((user: any) => console.log(user))}</div>;
}

export default UsersList;
The above code we are receiving the users using props and then just rendering using map function and doing console log for demo purpose. you can add list or table output here.
Lets see the output on browser.

Lets clear the console and add a new user then click on submit button

so, we have established single “source of truth” for users information in App component and We are updating the same list by passing data or lifting State up from child “NewUser” component to parent “App” component. once we updated the users information we are passing the same to another child component “UsersList” component of “App” component for further processing .
This is all about Lifting State up in React function component. you can read more about it at reactjs official post about lifting state up
Thanks and Happy Learning :). Please give your valuable feedback and share this post if you liked and learned something from this post.
Easy to understand for regular programmers. Nicely explained and multiple contents have been combined together in a unique perspective to enrich and enhance the skills of the reader.
Thanks