Introduction
When I started learning Asp.net WebAPIs few year back for a client project, I learned how to implement webAPI and how that can be exposed. There was a chapter in the book which talked about API versioning. I read that but I thought it might be for letter stage of application, or large applications only.
But I realized while doing actual API project development that API versioning is as important as exposing the API for the client to consume. It gives your application the direction for the future enhancements without lots of breaking changes due to technical debts.
You must have came across third party APIs like “/api/v1/Products” , where “v1” is actually API version1. So, here we are going to learn all about API versioning in this blog with actual implemetation in a sample project.
Ways to implement API Versioning
We can implement Api vesioning basically in three ways :-
- URL based API Versioning
- Header based API Versioning
- Query Parameter based API Versioning
Sample Project to implement API versioning.
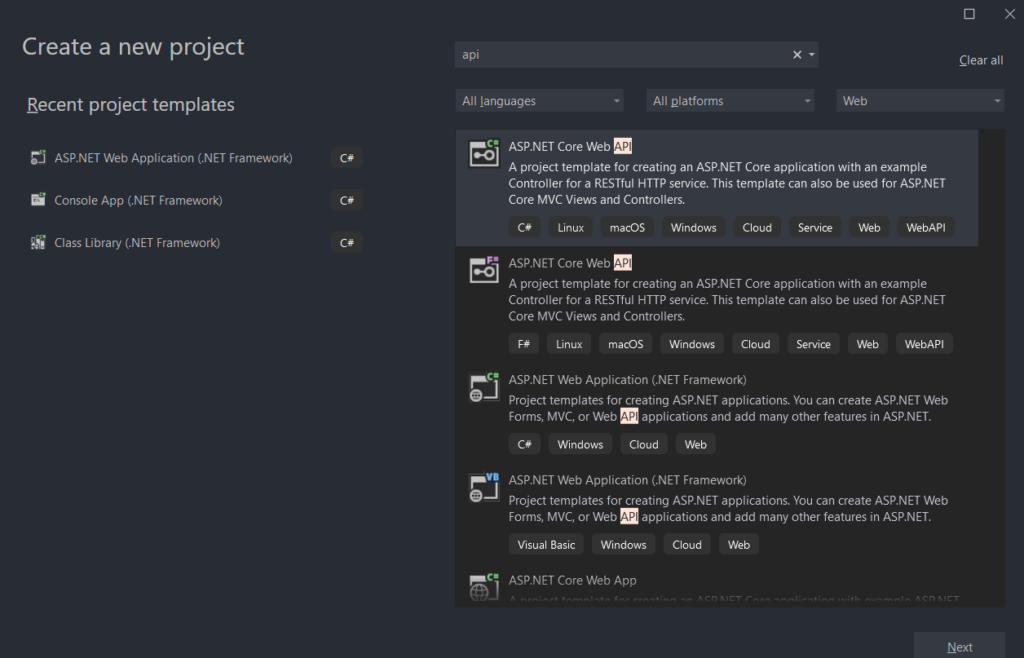
- Open Visual studio 2022 , go to File->New->Project, select ASP.NET Core Web API Project template and click on Next.
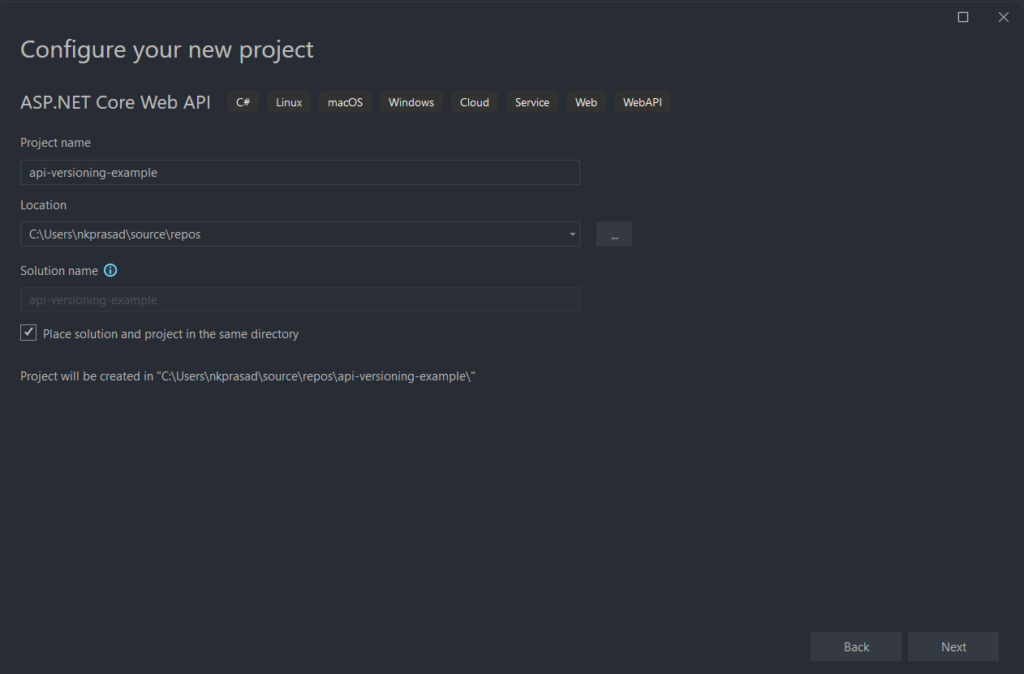
2. Give a name to the project , for instance “api-versioning-example” and click on Next.
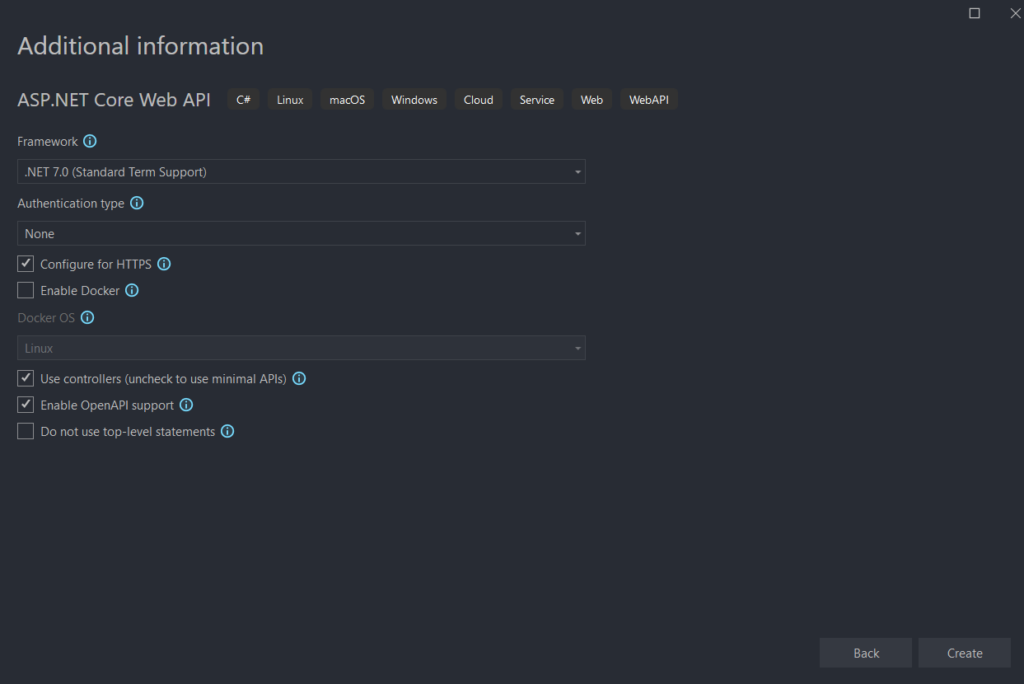
3. Select “.Net 7.0 (Standard Term Support)” as a Framework and Click on Create.
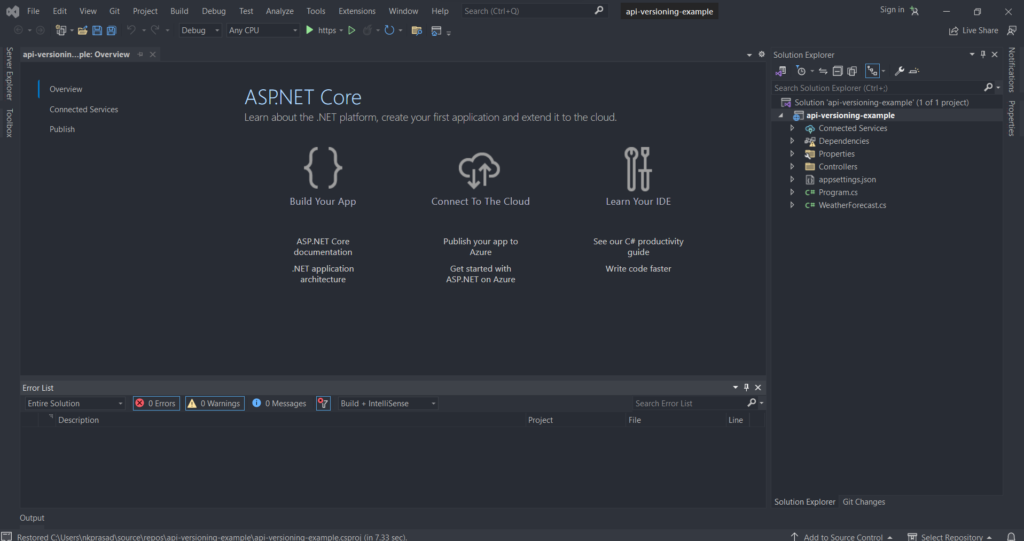
4. After successful creation, you would able to see a window somewhat like the below one.
We will add another assembly project to keep the API projects Models seperate. It is always a good practice to divide the code based on their logic and functions.
Select the solution and then Right click. Now Add->New Project and select the DLL category and then select the Class Library(.Net Framework) Project template from the List.
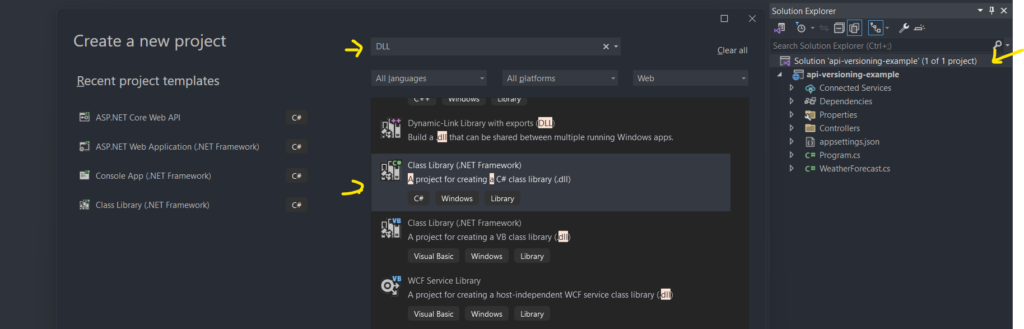
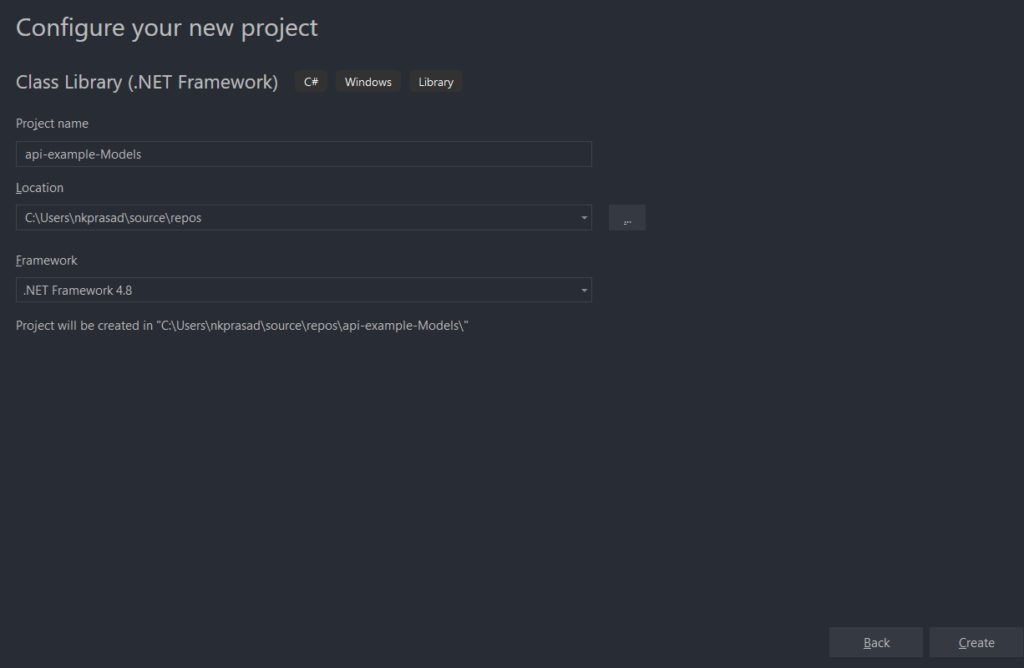
Click on Next. You need to provide the name for the DLL project now. Here we are naming it “api-versioning-Models”. Now click on Create.
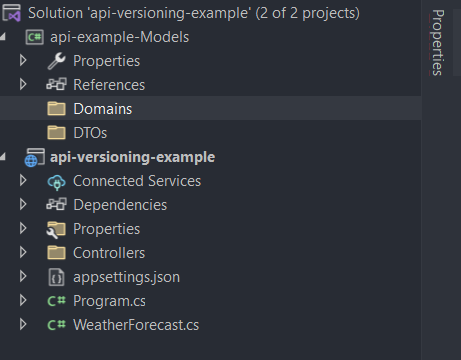
A new Project should be added to your solution now.

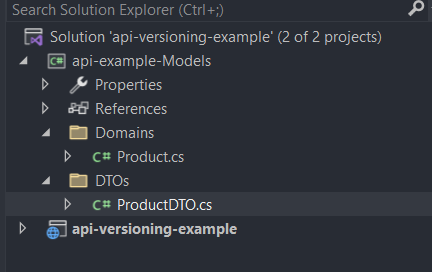
Delete the “Class1.cs” file and add the two folders names “Domains” and “DTOs” in it.
In Domains folder we will add a new Class name i.e “Product” and update its code to have some sample properties as below.
using System;

namespace api_example_Models.Domains
{
    public class Product
    {
        public int Id { get; set; }
        public string Name { get; set; }
        public string Description { get; set; }
        public string Category { get; set; }

        public double Price { get; set; }
    }
}
Also, in DTOs folder add a new class name “ProductDTO” and update it as below.
using System;


namespace api_example_Models.DTOs
{
    public class ProductDTO
    {
        public int Id { get; set; }
        public string Name { get; set; }
        public string Description { get; set; }
        public string Category { get; set; }
        public double Price { get; set; }
    }
}
The final structure would be like the one given below.
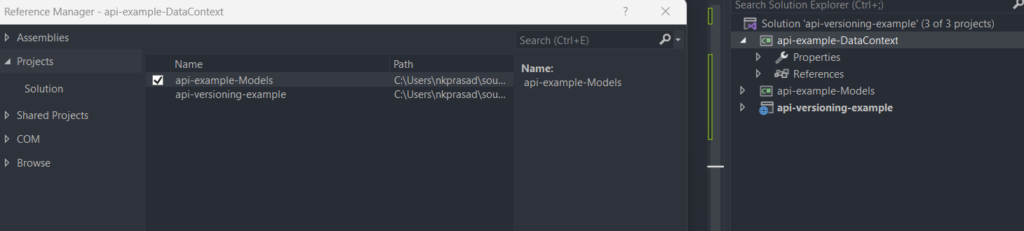
Now we will add a new DLL project in solution and name it “api-example-DataContext”. Once done, we will delete the “Class1.cs” file from it.
Now we will Select the “api-example-DataContext” Project and add the “api-example-Models” project as reference in it.
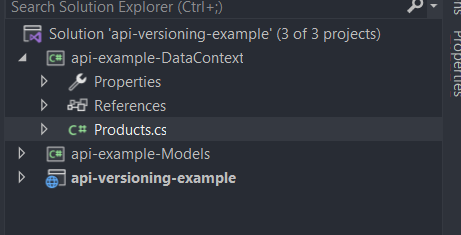
Now add a new Class “Products” in “api-example-DataContext” and update its code to return a sample product list. In actual application this would be returned from a databases.
using System;
using System.Collections.Generic;
using System.Diagnostics;
using System.Xml.Linq;
using api_example_Models;
using api_example_Models.Domains;

namespace api_example_DataContext
{
    public class Products
    {
        public List<Product> GetProducts()
        {
            // Sample Product List
            var products = new List<Product>();
            products.Add(new Product()
            {
                Id = 1,
                Name = "Product 1",
                Description = "Product 1 descrition",
                Category = "Fasion",
                Price = 250
            }
            );
            products.Add(new Product()
            {
                Id = 1,
                Name = "Product 2",
                Description = "Product 2 descrition",
                Category = "Electronics",
                Price = 150
            });

            return new List<Product>();
        }
    }
}
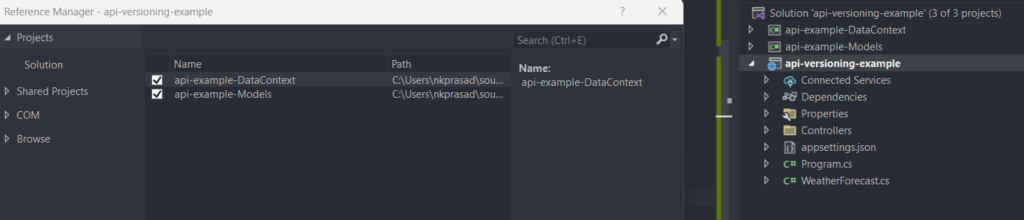
Now select the api project and add other two projects as reference.
Now select the “Controllers” and add a new API controller. you can name it “ProductController”. Now we will be creating a GET api which should returns all products, Update the ProductController with below code.
using Microsoft.AspNetCore.Http;
using Microsoft.AspNetCore.Mvc;
using api_example_Models.DTOs;
using api_example_DataContext;

namespace api_versioning_example.Controllers
{
    [Route("api/[controller]")]
    [ApiController]
    public class ProductController : ControllerBase
    {
        [HttpGet]
        public ActionResult<List<ProductDTO>> GetAllProducts()
        {
            var productDTOs = new List<ProductDTO>();
            var products = new Products().GetProducts();
            if(products != null)
            {
                foreach (var product in products)
                {
                    productDTOs.Add(new ProductDTO()
                    {
                        Id = product.Id,
                        Name = product.Name,
                        Description = product.Description,
                        Price = product.Price,
                        Category = product.Category,
                    });
                }
            }
            return productDTOs;
        }
    }
}
Out basic API is ready now. Lets test it once on browser.

URL based API Versioning
Now Lets start implementing the URL based API Versioning .
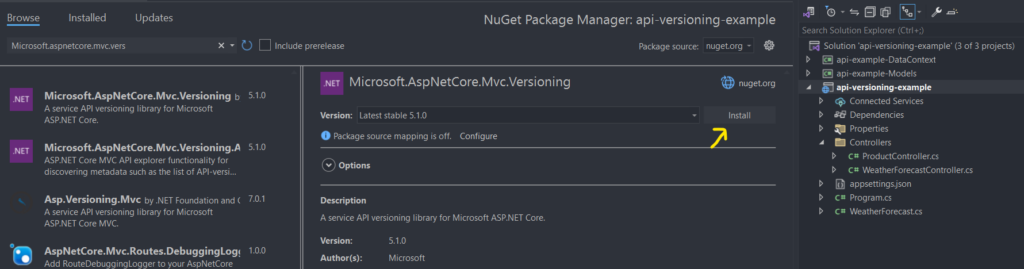
Right click on “api-versioning-example” project and then click on “manage Nuget package”. Search for “Microsoft.AspNetCore.Mvc.Versioning” package and install it in your project.
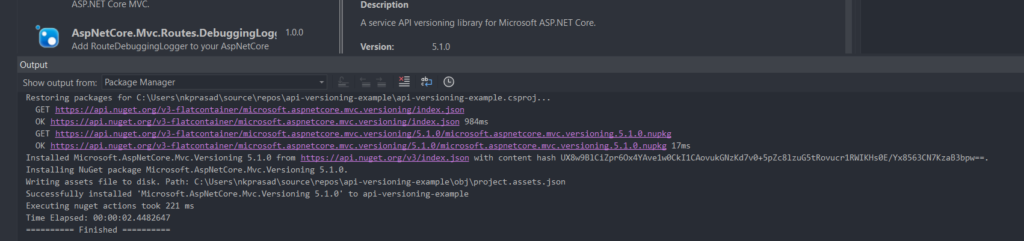
Once installed, you would see the following message.
Open Program.cs file and enable api versioning by inserting the given code after the “builder.Services.AddControllers();” line
builder.Services.AddApiVersioning();
Now, we will build two version of DTOs as the new DTO would return the requested changes in the new API version.
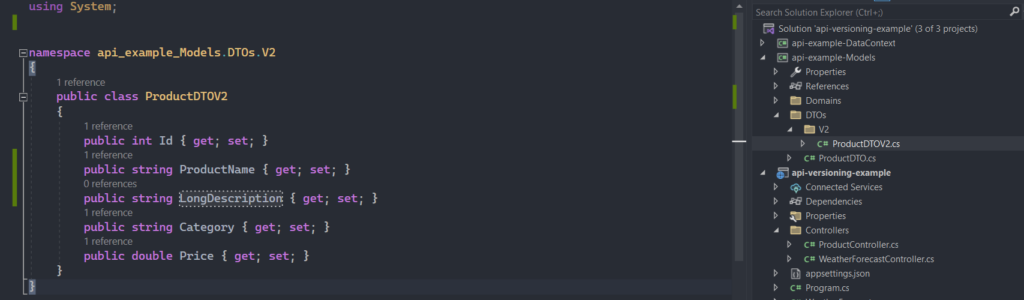
Lets go to “api-example-DataModels” Project and create new folder under the DTOs folder. Here, I have named it “V2”, next add a new class file named “ProductDTOV2”. Update its code with the code given below.
using System;


namespace api_example_Models.DTOs.V2
{
    public class ProductDTOV2
    {
        public int Id { get; set; }
        public string ProductName { get; set; }
        public string LongDescription { get; set; }
        public string Category { get; set; }
        public double Price { get; set; }
    }
}
In above code I have updated the Name to ProductName and Description to LongDescription.
Next, go to ProductController in Controllers folder and add a new HTTPGET method to return Product with updated field names. Below is its code.
        [HttpGet]
        public ActionResult<List<ProductDTOV2>> GetAllProductsV2()
        {
            var productDTOs = new List<ProductDTOV2>();
            var products = new Products().GetProducts();
            if (products != null)
            {
                foreach (var product in products)
                {
                    productDTOs.Add(new ProductDTOV2()
                    {
                        Id = product.Id,
                        ProductName = product.Name,
                        LongDescription = product.Description,
                        Price = product.Price,
                        Category = product.Category,
                    });
                }
            }
            return productDTOs;
        }
Now, we want to serve this new GET method when someone types “<domain name>/api/v2/Product” and return the previous Get method (GetAllProducts) response when someone types “<Domain name>/api/v1/Product”. Let us update the ProductController to achieve this.
In Product Controller, just before the class Name insert the given code block.
    [Route("api/v{version:apiVersion}/[controller]")]
    [ApiController]
    [ApiVersion("1.0")]
    [ApiVersion("2.0")]
We will insert this line above the [HttpGET] for the “GetAllProducts” method.
[MapToApiVersion("1.0")]Also insert the given line above the [HttpGet] for the “GetAllProductsV2” method.
[MapToApiVersion("2.0")]This is how the final ProductController would look.
using Microsoft.AspNetCore.Http;
using Microsoft.AspNetCore.Mvc;
using api_example_Models.DTOs;
using api_example_DataContext;
using api_example_Models.DTOs.V2;

namespace api_versioning_example.Controllers
{
    [Route("api/v{version:apiVersion}/[controller]")]
    [ApiController]
    [ApiVersion("1.0")]
    [ApiVersion("2.0")]
    public class ProductController : ControllerBase
    {
        [MapToApiVersion("1.0")]
        [HttpGet]
        public ActionResult<List<ProductDTO>> GetAllProducts()
        {
            var productDTOs = new List<ProductDTO>();
            var products = new Products().GetProducts();
            if(products != null)
            {
                foreach (var product in products)
                {
                    productDTOs.Add(new ProductDTO()
                    {
                        Id = product.Id,
                        Name = product.Name,
                        Description = product.Description,
                        Price = product.Price,
                        Category = product.Category,
                    });
                }
            }
            return productDTOs;
        }

        [MapToApiVersion("2.0")]
        [HttpGet]
        public ActionResult<List<ProductDTOV2>> GetAllProductsV2()
        {
            var productDTOs = new List<ProductDTOV2>();
            var products = new Products().GetProducts();
            if (products != null)
            {
                foreach (var product in products)
                {
                    productDTOs.Add(new ProductDTOV2()
                    {
                        Id = product.Id,
                        ProductName = product.Name,
                        LongDescription = product.Description,
                        Price = product.Price,
                        Category = product.Category,
                    });
                }
            }
            return productDTOs;
        }
    }
}
Run the application.
Now go to the browser and the Product url with V1(http://localhost:5062/api/v1/Product) as below. You would get response as below.
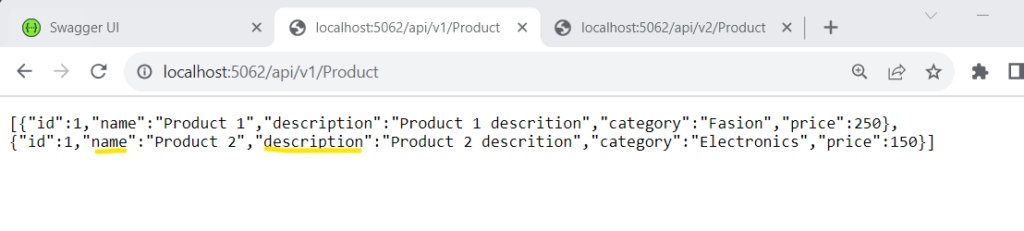
Now type the new V2 Api for Product “http://localhost:5062/api/v2/Product”
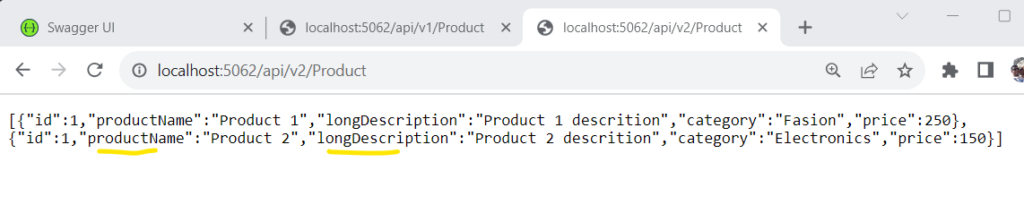
By comparing both the outputs, you can conclude that V1 is returning the same response but V2 is returning the updated response. But if you type the old url(http://localhost:5062/api/Product) without version, you may get error.
This is how you can add support for api versioning in your asp.net WebAPI project.
We have seen how we can add support for API versioning in route which is a popular and the obvious way. Now lets explore some more ways for it.
Header based API Versioning
To implement header based versioning we need to make following changes in application.
Replace the “builder.Services.AddApiVersioning()” line in program.cs file with below code.
builder.Services.AddApiVersioning(options =>
{
    options.ApiVersionReader = new HeaderApiVersionReader("api-version");
    options.ReportApiVersions = true;
});
Replace the “[Route(“api/v{version:apiVersion}/[controller]”)]” in ProductController file with “[Route(“api/[controller]”)]”.
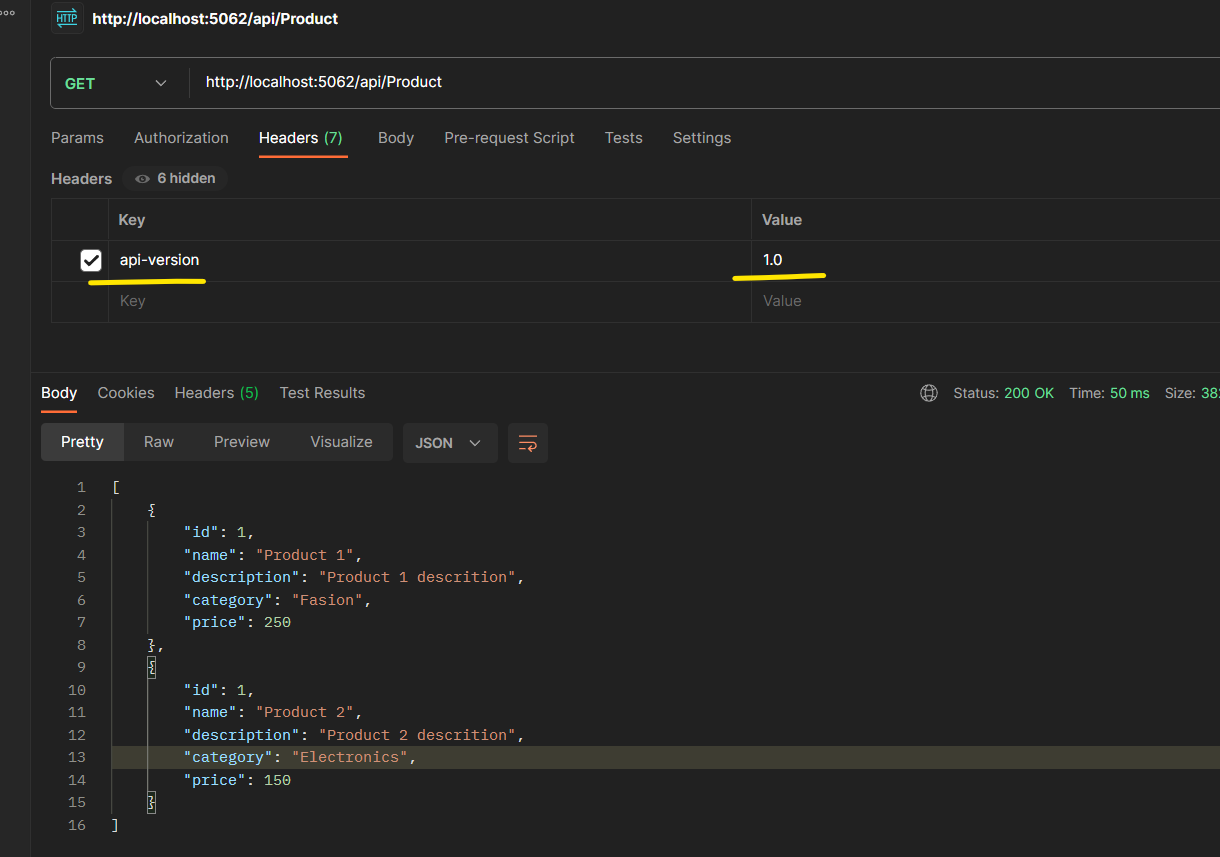
Now run the application. Here we need to use some rest client like postman to pass the header information.
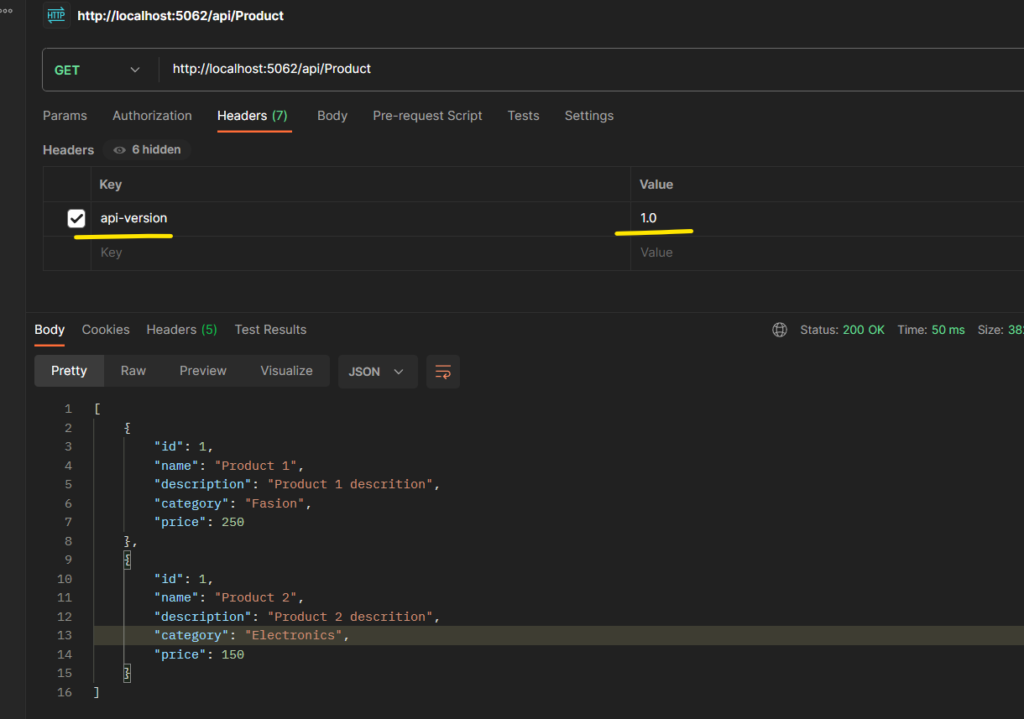
You can try changing the “api-version” header to 2.0, then you will get the 2.0 products output.
Query Parameter based API Versioning
Now let us take a look on how to implement Query Parameter based API Versioning.
For this update the below line of code in program.cs file.
builder.Services.AddApiVersioning(options =>
{
    options.ApiVersionReader = new HeaderApiVersionReader("api-version");
    options.ReportApiVersions = true;
});
Change the “HeaderApiVersionReader” to “QueryStringApiVersionReader”. The updated code should look like the one given below.
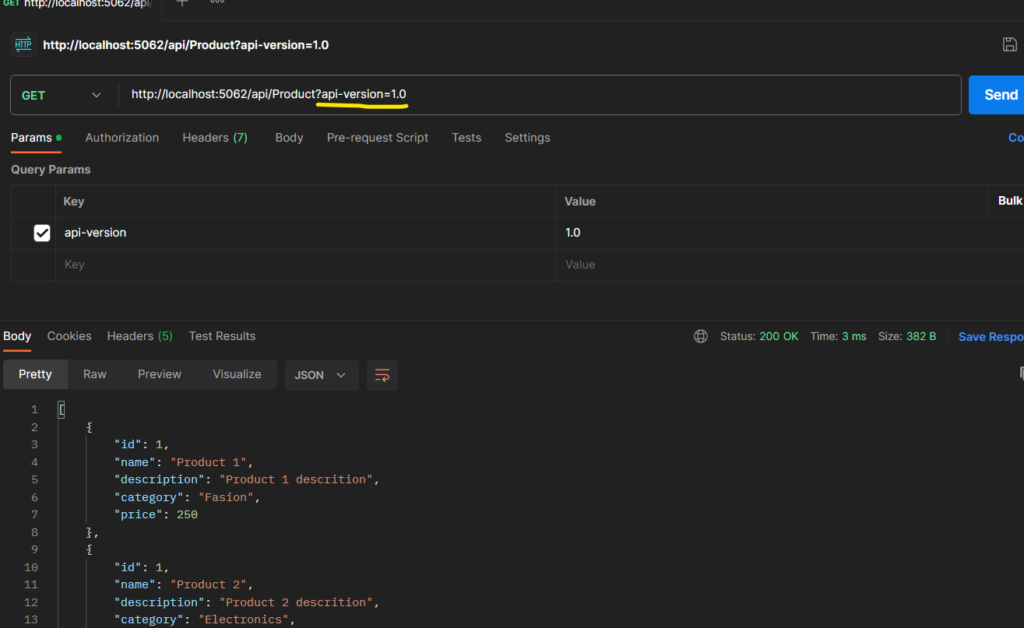
builder.Services.AddApiVersioning(options =>
{
    options.ApiVersionReader = new QueryStringApiVersionReader("api-version");
    options.ReportApiVersions = true;
});
Browse the url with api-version as parameter. You should get similar output as below.
This is how you can implement the API versioning in asp.net core API.
Summary
In this comprehensive guide, we have explored the world of API versioning within ASP.NET Core WebAPI. You’ll discover three battle-tested methods for implementing API versioning effectively, ensuring seamless compatibility across your applications. Whether you’re an experienced developer or an intern, this post will assist you with valuable insights to help you manage and optimize your APIs with confidence. Explore the latest techniques and practices them to stay ahead in the ever-evolving landscape of ASP.NET Core WebAPI.